
Introduction
Over the years, we've seen countless sophisticated phishing attacks from various threat actors using complex initial access chains against real environments. But sometimes, it’s far simpler than that. A convincing email is often enough. You don’t need hundreds of people to click a link or hand over credentials, you just need one.Phishing is one of those techniques that never really goes away. New controls come out all the time; 2FA, hardware tokens, better spam filtering, and now AI-based detection, but in practice a lot of organisations don’t fully adopt them and it usually comes down to effort. Changing a process that already works, especially in a large corporate environment, gets pushed down the priority list.
For practicing phishing, most tutorials either jump straight to the interesting bits, show a finished setup, or assume you already have domains and VPS infrastructure to play with. That’s not always realistic, especially if you’re just getting started and want to practice for free. So I’m going to build this up gradually, starting with a basic AD lab in VMware (1 DC, 2 workstations, a few users) showing a way to set up a free email server, then moving into VPS, domains, redirectors, and OPSEC later on.
This post focuses on getting GoPhish running locally in that environment, along with a simple email setup for each user and configuring Outlook so you can actually see how your phishing emails might look in a real client. I’m not going to cover building the AD lab itself, there are plenty of good guides for that already, and nothing advanced is needed here (just a workstation and some users).
AD Environment Pre-requisites
As stated above, you should already have a small AD environment with at least 1 DC, 1 workstation and 2 users. For context, my environment is as follows:- Domain: rootsec.local
- Domain Controller: dc01.rootsec.local (192.168.242.210)
- Workstation 1: WS-01.rootsec.local (192.168.242.211)
- Workstation 2: Ws-02.rootsec.local (192.168.242.212)
- Kali (GoPhish): 192.168.241.224
- 4 users:
- Jamie Robinson (standard user)
- Emily Carter (standard user)
- Rachel Bennett (domain admin)
- Daniel Harper (domain admin)
- Jamie Robinson (standard user)

Current users in AD environment
Mail Server Options
There are a number of potential options for installing a local email server for a testing environment including MS Exchange (w/ 180 day trial), Mailcow and hMailServer. For beginners and the purpose of this lab, the easiest method is by using hMailServer - but feel free to play around with other options in your own time. In terms of recommended resources for each of these environments, the following should serve as a baseline:| Lab Setup | Components | RAM (Minimum) | RAM (Comfortable) |
|---|---|---|---|
| hMailServer (on DC) | DC (AD + hMailServer) 2x Workstations | 6GB | 8–12GB |
| Mailcow (separate VM) | DC (AD + DNS) MAIL01 (Mailcow) 2x Workstations | 10GB | 12–16GB |
| Exchange Server (separate VM) | DC (AD + DNS) EX01 (Exchange) 2x Workstations | 16GB | 20–28GB |
hMailServer
The easiest and least taxing way to install a mail server is by using an old software called hMailServer.Installation
To start, hMailServer can be downloaded from the following link. It's important to note that it's no longer actively maintained (last updated 5 years ago) so do not run this in a production or exposed environment; but for a local GoPhish installation for training purposes, it does its job.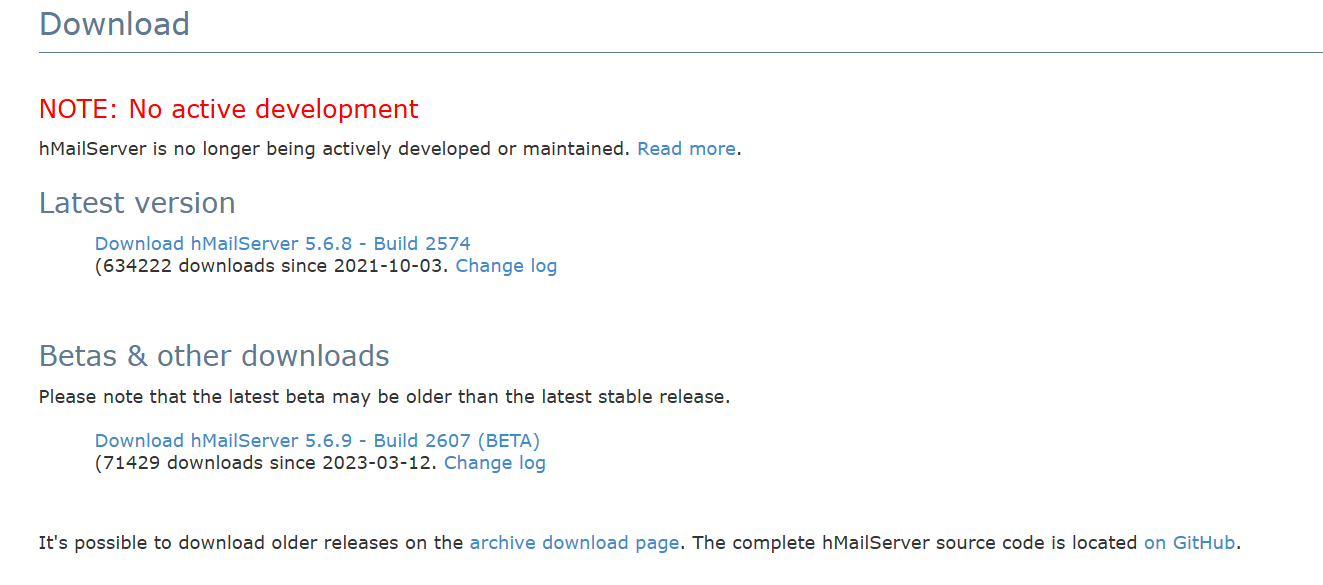
hMailServer download page
Run the installer and accept the license agreement as normal.
hMailServer Setup
At the components section, make sure to do the full installation for both the server component and the administrative panel so both components are installed on the domain controller.
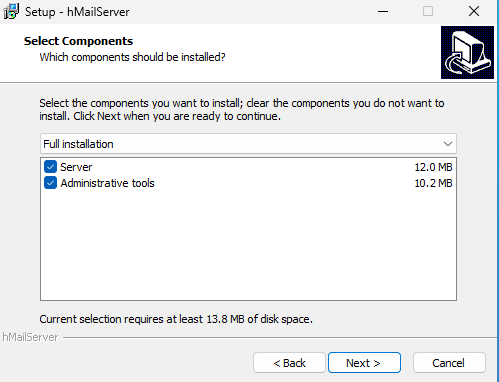
hMailServer full installation
For ease of use regarding the database setup, choose the built-in database engine that uses a compact version of MSSQL.

hMailServer built-in database
It will then prompt for a password that you will use to login to the administrative panel - make sure you remember this password.
hMailServer admin password
.NET Framework 2.0 Error
While running through, it will likely prompt you to install .NET Framework 2.0 if it is not currently installed.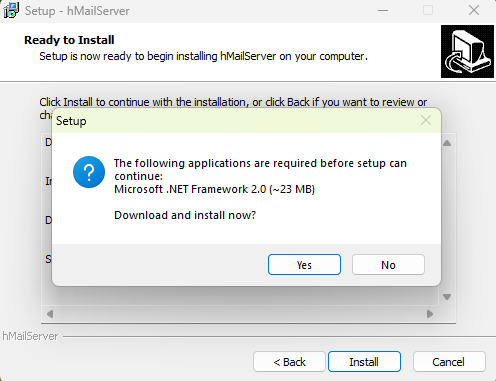
.NET Framework 2.0 Installer
However, if you try and allow it to download, it will fail as the link it uses to grab the installer returns a 404 Not Found from Microsoft's own website, likely due to .NET 2.0 being deprecated.
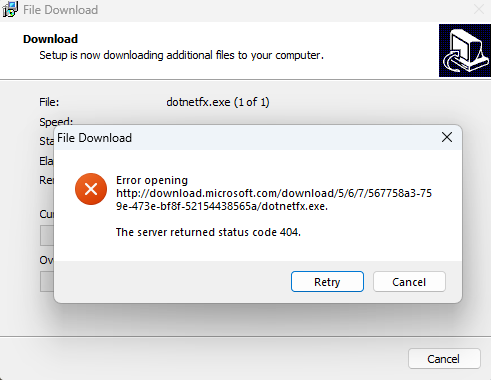
.NET 2.0 404 error
To solve this, you can install the .NET Framework 3.5 feature through the "Add Roles and Features Wizard" on the Domain Controller - this will install .NET 3.0 and .NET 2.0 for us.
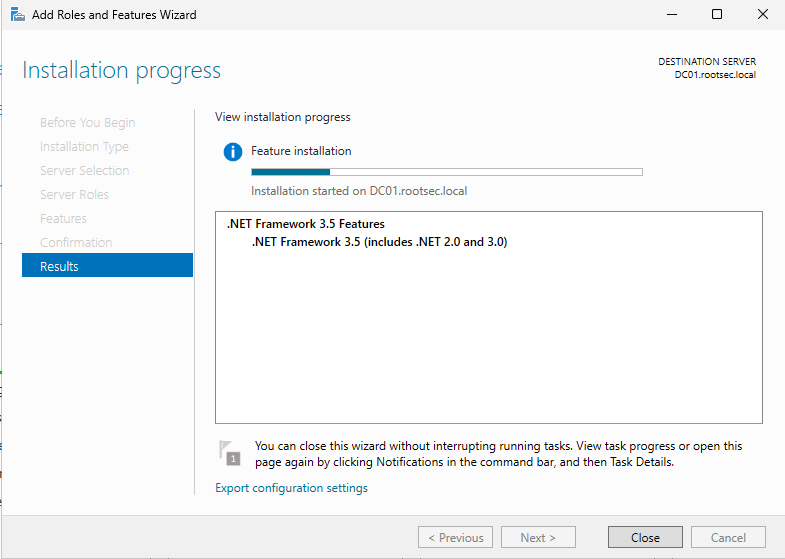
.NET Framework install on DC
hMailServer Configuration
Once installed, open "hMailSever Administrator" and you will be greeted with a connection screen, allowing you to add hostnames and usernames for connecting to different servers. For our purposes, it should be pre-populated with the localhost and administrator.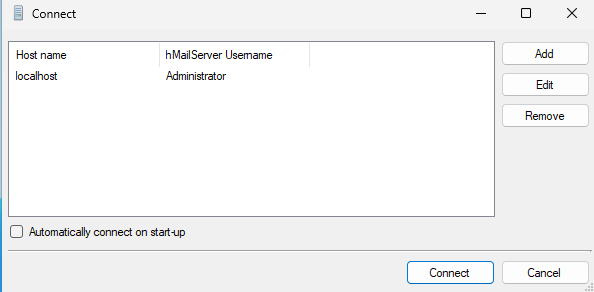
hMailServer connect page
After hitting "Connect" and entering the password, the software will start and prompt you to immediately add a domain.
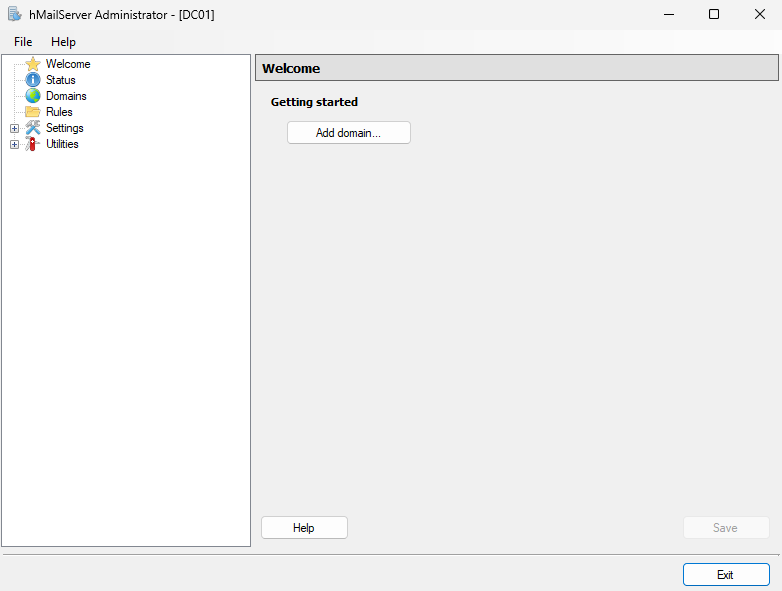
Admin panel dashboard
Click it and add your Active Directory domain (i.e. rootsec.local) and make sure the tick mark is checked for "Enabled".
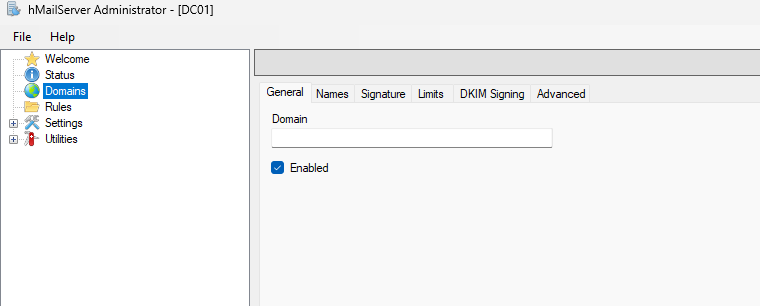
Domain configuration
Your domain should then appear in the left navigation panel. Expand the domain and click on the "Accounts" folder to add some user email accounts to the server.
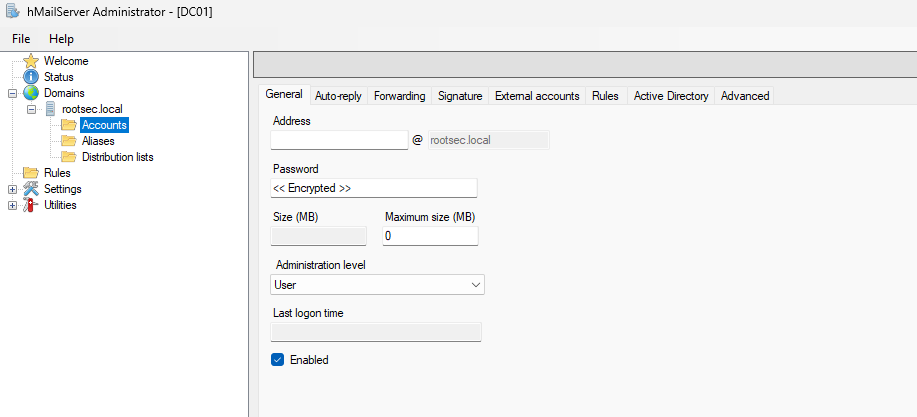
Accounts page
You have two options for adding accounts:
- Local accounts with different passwords
- Integrate with their Active Directory account and credentials
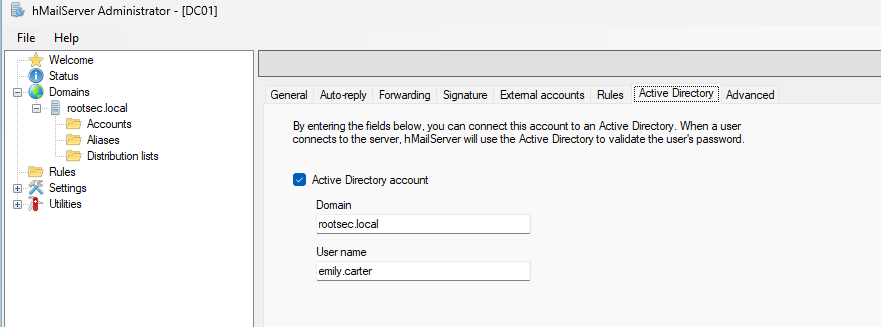
Adding an AD account
Add all of the AD user accounts you want mailboxes for - I added all 4 users.
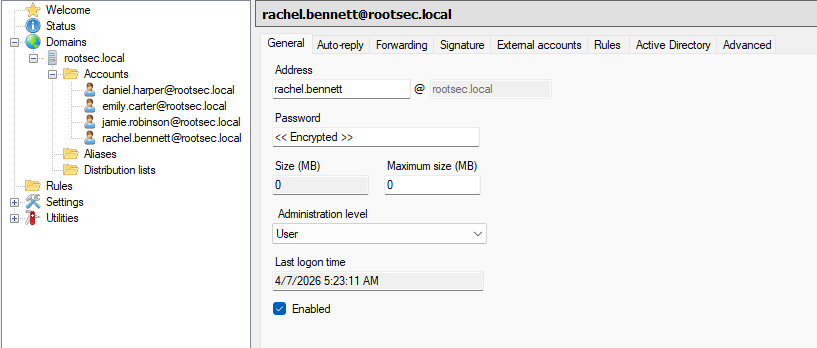
All user inboxes added
Email Clients
To be able to interact with the email server and read/send emails, we need some sort of email client. The main option is Microsoft Outlook since it is what most organisations use and represents a realistic environment the best.However, if you try to use the latest version of Microsoft Outlook, you’ll quickly run into issues. During my testing, it doesn’t play nicely with older/deprecated software like hMailServer.
The reason is that modern Outlook isn’t really designed to talk to traditional IMAP/SMTP servers in the way these older clients do. Modern Outlook (i.e. MS365 versions) is targeted towards more cloud services like Exchange and Outlook.com rather than older on-prem solutions.
Digging around under the hood, it prefers modern authentication methods and secure-by-default configurations. Since we are using plaintext IMAP and SMTP for our environment, these are treated more like legacy compatibility features and in some cases they’re not supported at all.
In a simple lab setup like this, we’re using:
- IMAP on port 143 (without TLS)
- SMTP on port 25 or 587
- Basic username/password authentication
Different clients such as Thunderbird can be used as alternatives as they happily connect to a cleartext IMAP/SMTP server and let you manually define everything.
Thunderbird Installation
Thunderbird is an email client similiar to Outlook, but made by the company behind Firefox - Mozilla. It acts and looks very similiar to Outlook so should feel familiar to you. After downloading and installing it on the workstation VMs, open it and enter the email credentials you set up earlier and login with your AD password: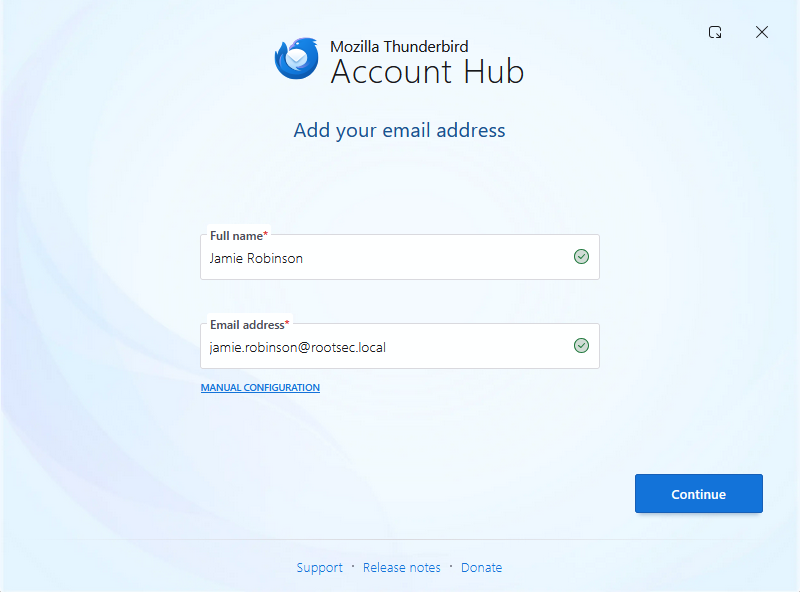
Thunderbird launcher
If you are lucky, hitting Continue will automatically detect the configuration found and add all the IMAP and SMTP settings for you:
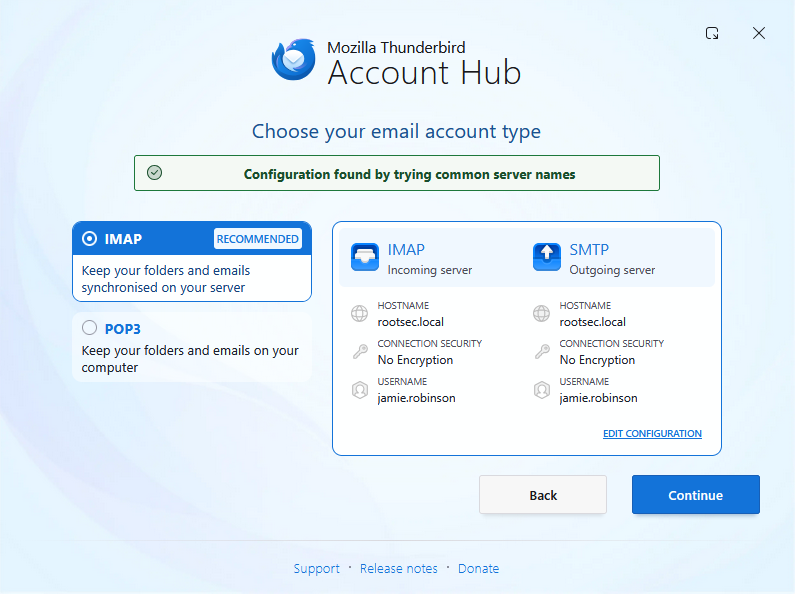
Thunderbird account type
However if you are unlucky like me, the first time setup may fail to automatically find these settings. If that happens, you can select "Manual Configuration" and enter the details by filling in the incoming server settings first.
- Protocol: IMAP
- Hostname: dc01.rootsec.local
- Port: 143
- Username: jamie.robinson@rootsec.local
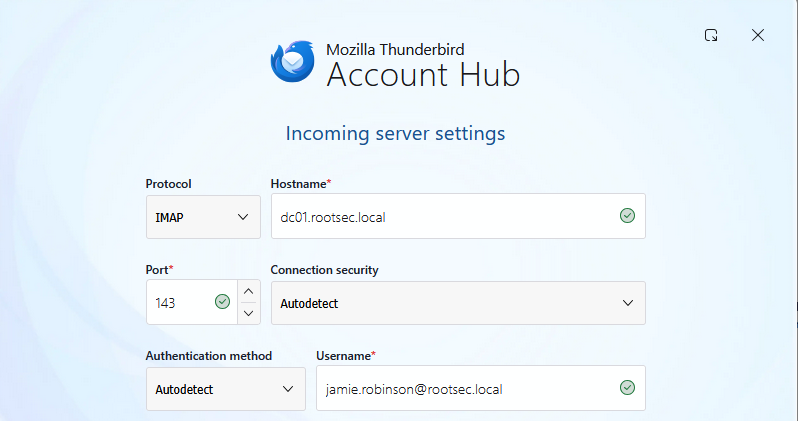
Incoming server settings
And the outgoing settings:
- Protocol: SMTP
- Hostname: dc01.rootsec.local
- Port: 587
- Username: jamie.robinson@rootsec.local
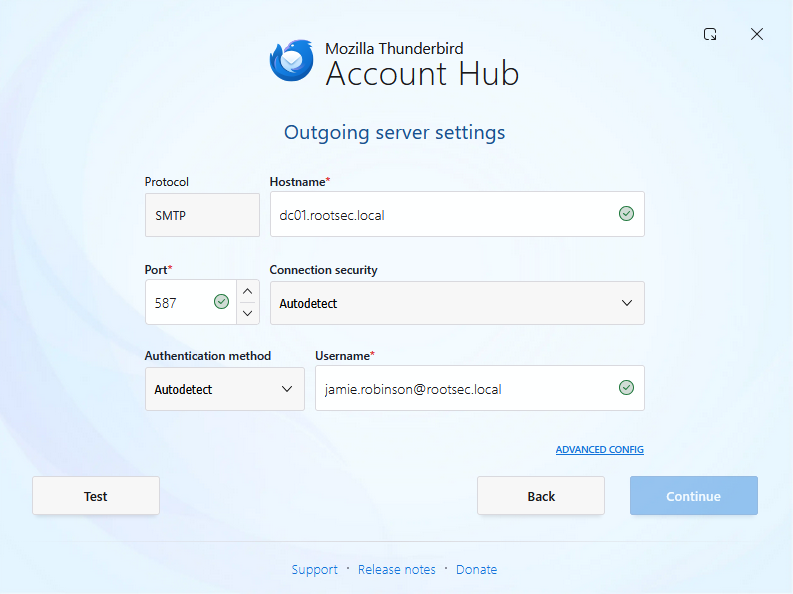
Outgoing server settings
Clicking the "Test" button will make sure these settings are valid and should (hopefully!) come back with settings it found by probing the server:
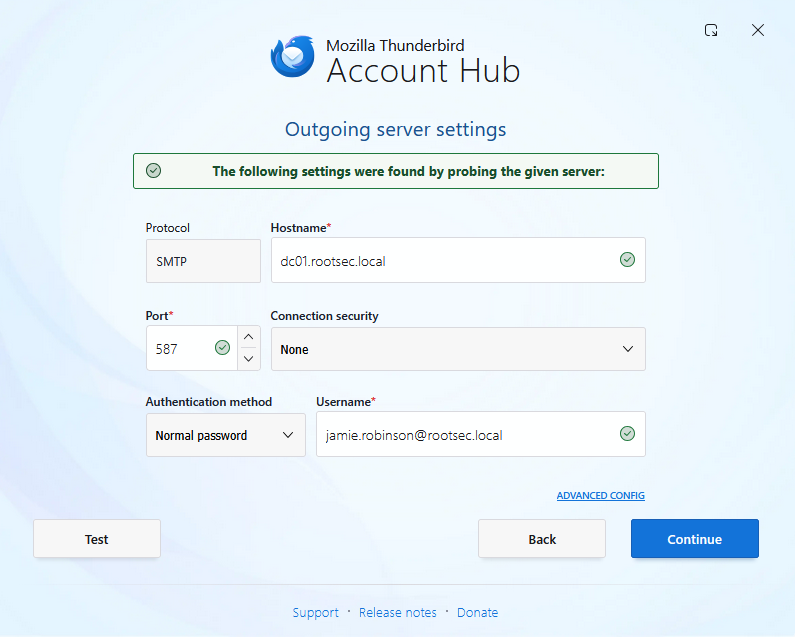
Settings found
Hit Continue and then enter your password. If all went well, you should be presented with the Thunderbird dashboard and an inbox for your user present:
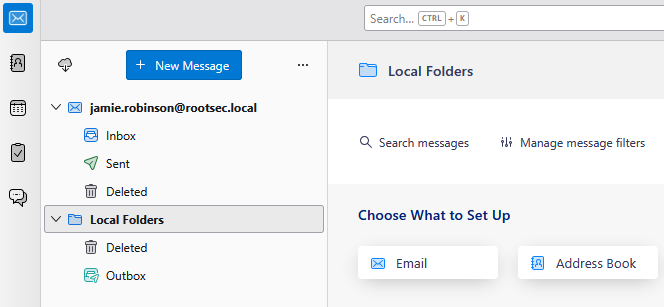
User inbox added
If everything worked, do the same on the second workstation if you have one and you should have two separate email inboxes setup on two machines:
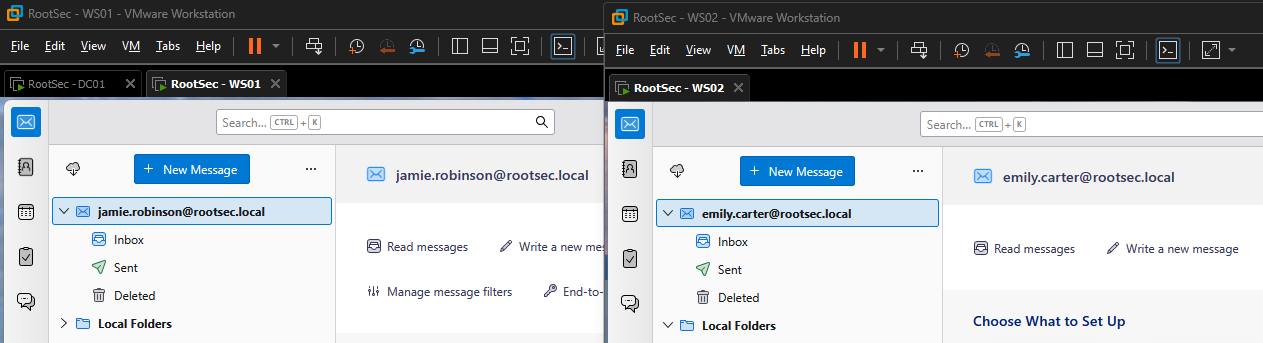
Two mailboxes setup
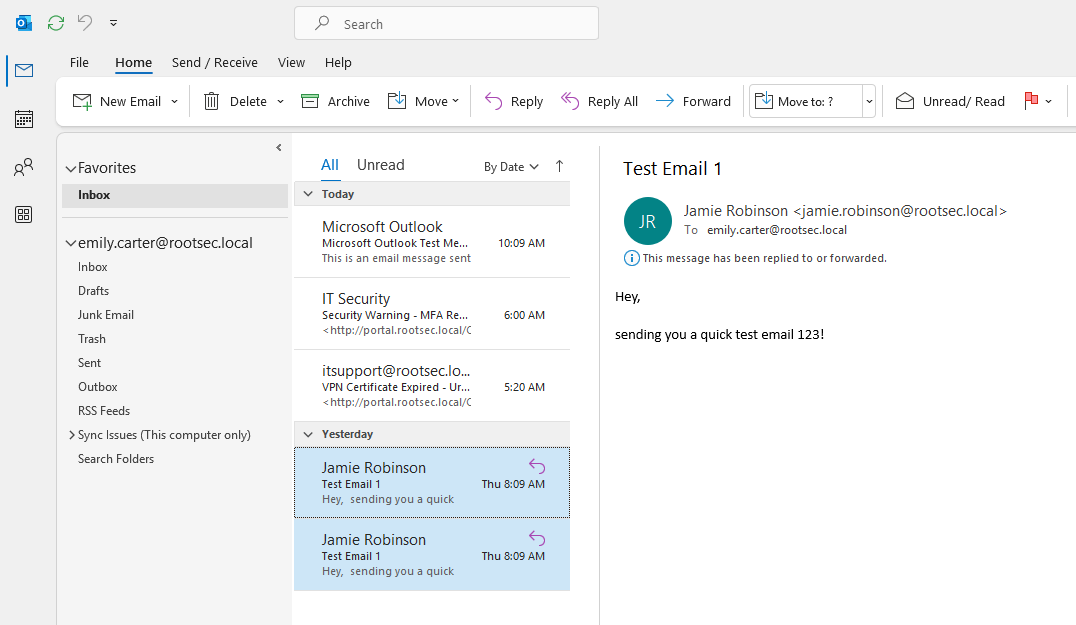
Now you can send and receive email from both users. With email working, GoPhish can be installed on a Kali VM to start crafting and sending some phishing emails. See the GIF below to see the emails working as intended.
Demo email conversation
Outlook Classic Installation
As stated above, if you want to use Outlook, you need the “classic” desktop version and not the new version. To get the old version, you simply need to install Office 365 by running the installer - you can grab it from here.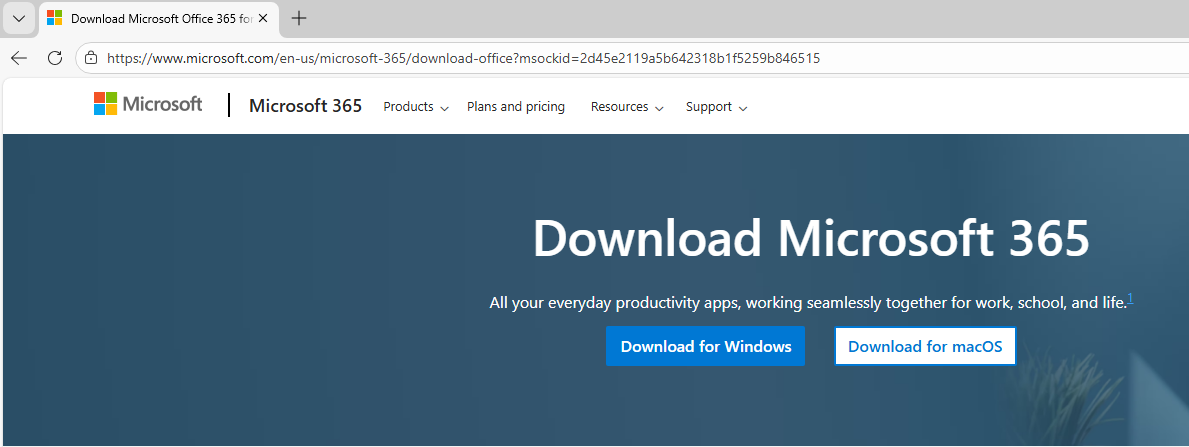
Demo email conversation
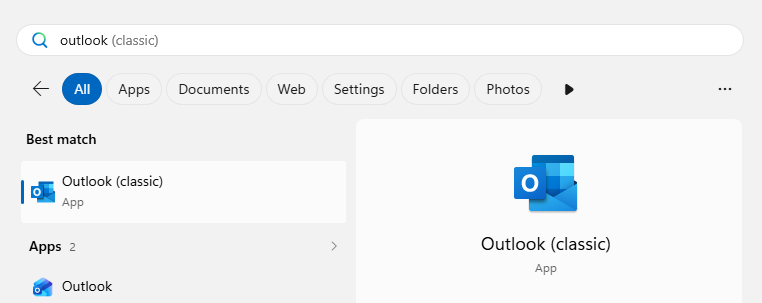
After installation, you can then open the Outlook Classic option - make sure it says (classic) in brackets.
Demo email conversation
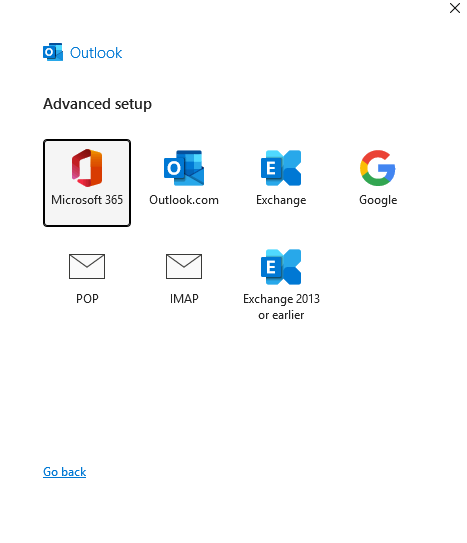
Upon running, it will prompt you to enter an email address - enter the email you want and then select "Advanced Setup" and be sure to choose the IMAP option.
Demo email conversation
And enter the email server settings as follows:
- Email server: dc01.rootsec.local
- Incoming port: 143
- Outgoing port: 25
- No encryption
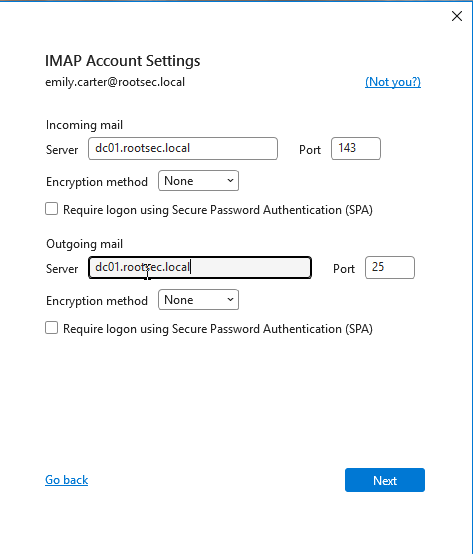
Demo email conversation
If successful, it should find the account and add it to Outlook. Opening Outlook once more should present you with the normal inbox with full functionality.
Demo email conversation
Troubleshooting
If you encounter any issues, these are a list of issues I ran into personally - it may help you and solve your issue.DC Settings Troubleshooting
When testing this locally, I ran into a couple of issues. First was the email ports were not exposed or open on the DC after runningnetstat -antb - make sure that all of the email ports are open and listening:- Port 25
- Port 110
- Port 143
- Port 587
- Port 993 (optional)
- Port 995 (optional)
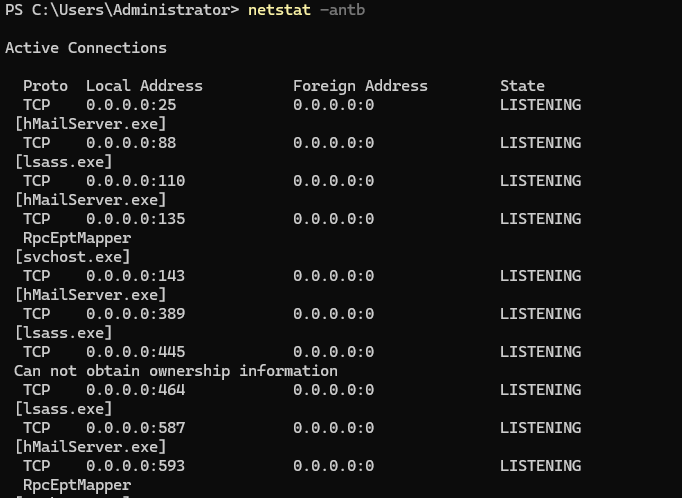
Netstat open ports
If these ports are not open or you cannot connect to them, run the following PowerShell commands to add firewall rules.
1New-NetFirewallRule -DisplayName "Allow SMTP" -Direction Inbound -Protocol TCP -LocalPort 25 -Action Allow
2New-NetFirewallRule -DisplayName "Allow SMTP Submission" -Direction Inbound -Protocol TCP -LocalPort 587 -Action Allow
3New-NetFirewallRule -DisplayName "Allow IMAP" -Direction Inbound -Protocol TCP -LocalPort 143 -Action Allow
4New-NetFirewallRule -DisplayName "Allow IMAPS" -Direction Inbound -Protocol TCP -LocalPort 993 -Action Allow
5New-NetFirewallRule -DisplayName "Allow POP3" -Direction Inbound -Protocol TCP -LocalPort 110 -Action Allow
6New-NetFirewallRule -DisplayName "Allow POP3S" -Direction Inbound -Protocol TCP -LocalPort 995 -Action Allow
Once added, make sure you can access these ports from the workstations using something like
Test-NetConnection - it should return TRUE if it can be reached:1Test-NetConnection dc01.rootsec.local -Port 143
2Test-NetConnection dc01.rootsec.local -Port 25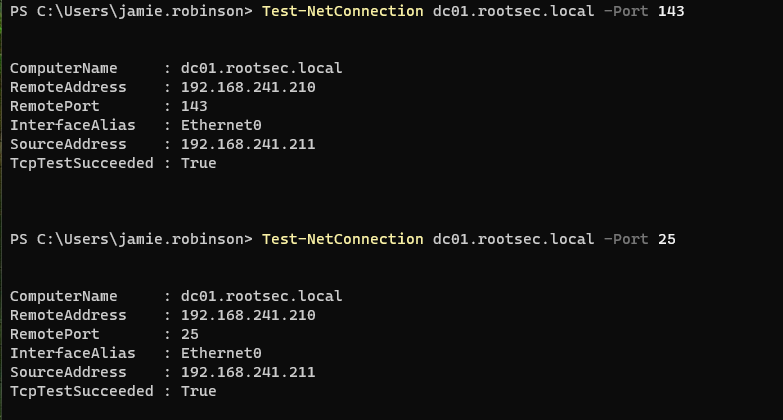
Test-NetConnection results
Another issue that might crop up is the MX DNS records on the domain controller. Make sure that there are entries for "dc01" or the name of your DC. Additionally, make sure there is an MX record tied to DC01 - the following properties worked for me.
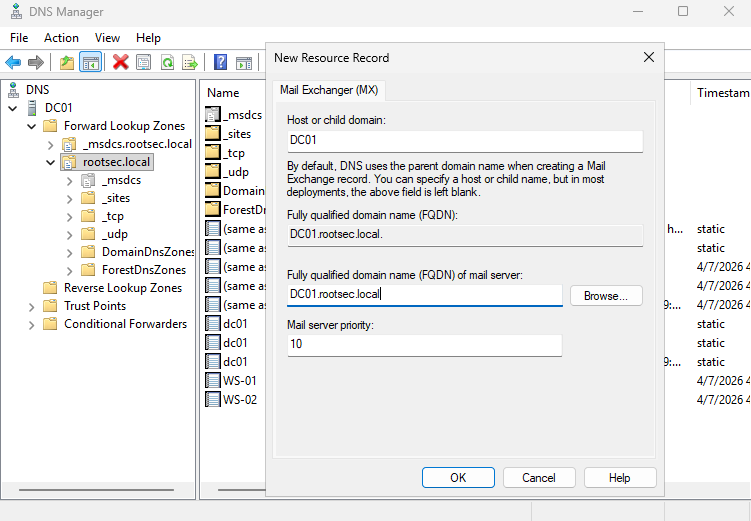
Adding MX record
Once set, make sure you can resolve hostnames using
nslookup from a workstation - if it resolves, you should be good to go.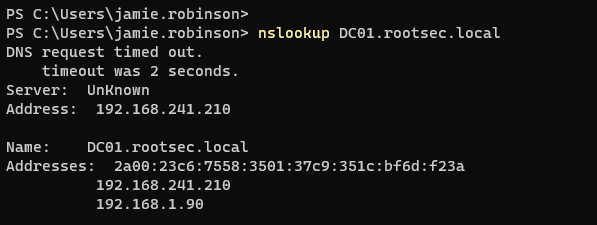
Nslookup result
One last issue you may run into is that your Kali machine on the same network will not be able to resolve any of the domain names. Make sure that your
/etc/resolv.conf file has the nameserver correctly pointing to your DC IP.1cat /etc/resolv.conf
2
3# If not set, create the line
4nameserver 192.168.241.210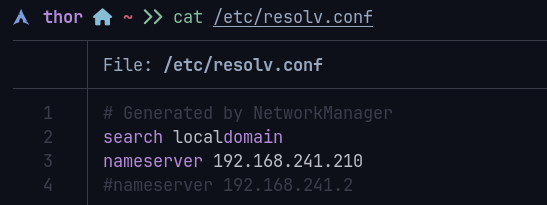
DNS resolvers
Email Troubleshooting
If you encounter any errors or problems being able to log into the email client with your user account, a couple of solutions below may help you that I ran into - these should solve 99% of your errors.Server Not Found
First, if Thunderbird fails to find settings, expand the error message to see what it says - in my case, I got an error telling me that it cannot find the server.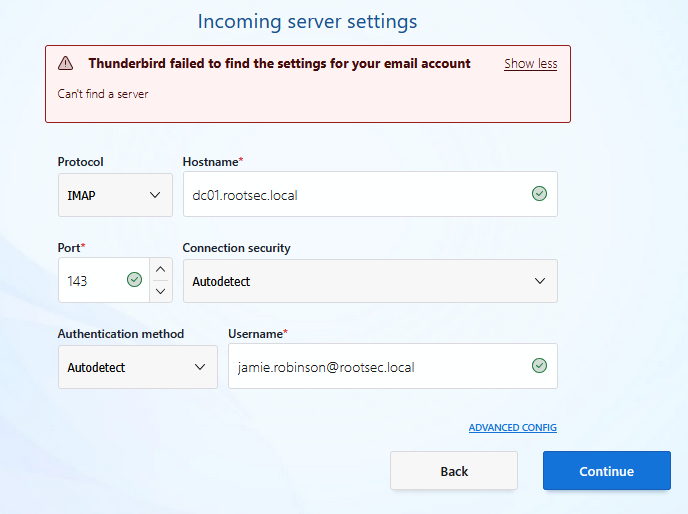
Server not found
If it says this, it likely means that there is a networking issues - check that the email ports are open on the DC and that you can connect to them. If you cannot, refer to the "DC Settings Troubleshooting" section and try adding a firewall rule.
Auto Ban Rule
Another error you may encounter is if you attempt too many login failures while troubleshooting these issues, then hMailServer will implement an "auto-ban" rule for that account. To see these auto-ban rules, go to Advanced -> IP Ranges in hMailServer Administrator.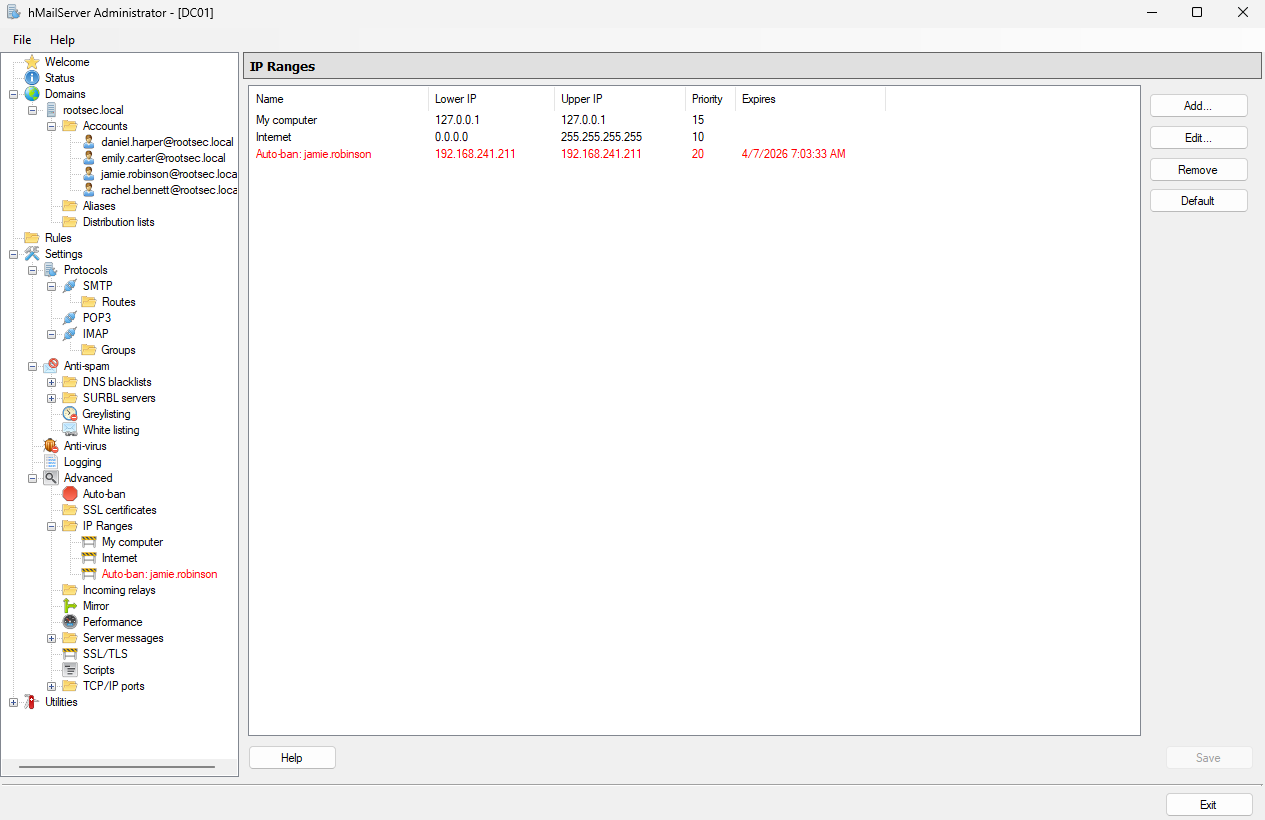
Auto ban rule present
Allow/Deny List Settings
Inside the same IP ranges section, there will be some default allow/deny lists - typically called "My computer" and "Internet". Make sure you are not blocking your own IP range from accessing the DC otherwise the email will fail. For best practices, add a new rule and make sure the following is applied:- Allow connections: SMTP, POP3, IMAP
- Other: Require SSL/TLS for authentication is turned off
- "Allow deliveries from" are all ticked
- "Require SMTP authentication" is set to all but external to local
- Set the lower IP and upper IP to a range that includes all machines in your VM subnet
- Set priority to 10
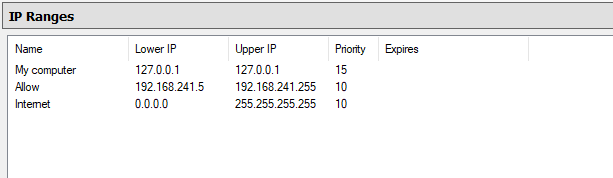
Allow list configured
GoPhish Setup
With the environment fully setup to send and receive email, it's time to look into GoPhish. In a real phishing engagement for a client, you would install GoPhish on a VPS somewhere, register a domain you control (i.e. totallynotaphish.com), and build your infrastructure around that and try to tame the beast that breaks everything - DNS - by setting up custom records so it points to your GoPhish instance for hosting the phishing site.In a test environment, we can install GoPhish on a Kali instance connected to the same network for simplicity sake. You can take this further and try implementing a pfSense firewall, separating the Kali from the AD environment and see if you can get that to work.
For now, download the latest GoPhish version from their official GitHub. As of writing, the latest updated version is v0.12.1. After downloading the ZIP file, unzip it and move inside the gophish directory:
1unzip gophish-v0.12.1-linux-64bit.zip
2cd gophish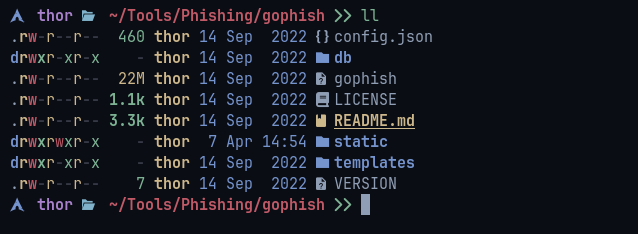
GoPhish unzip
Running GoPhish is as simple as launching the gophish binary inside. It will produce some scary looking lines but if everything is successful it should start the phishing server on port 80 and admin server on port 3333 by default - it will also produce temporary admin credentials for the first time login.
1chmod +x gophish
2sudo ./gophish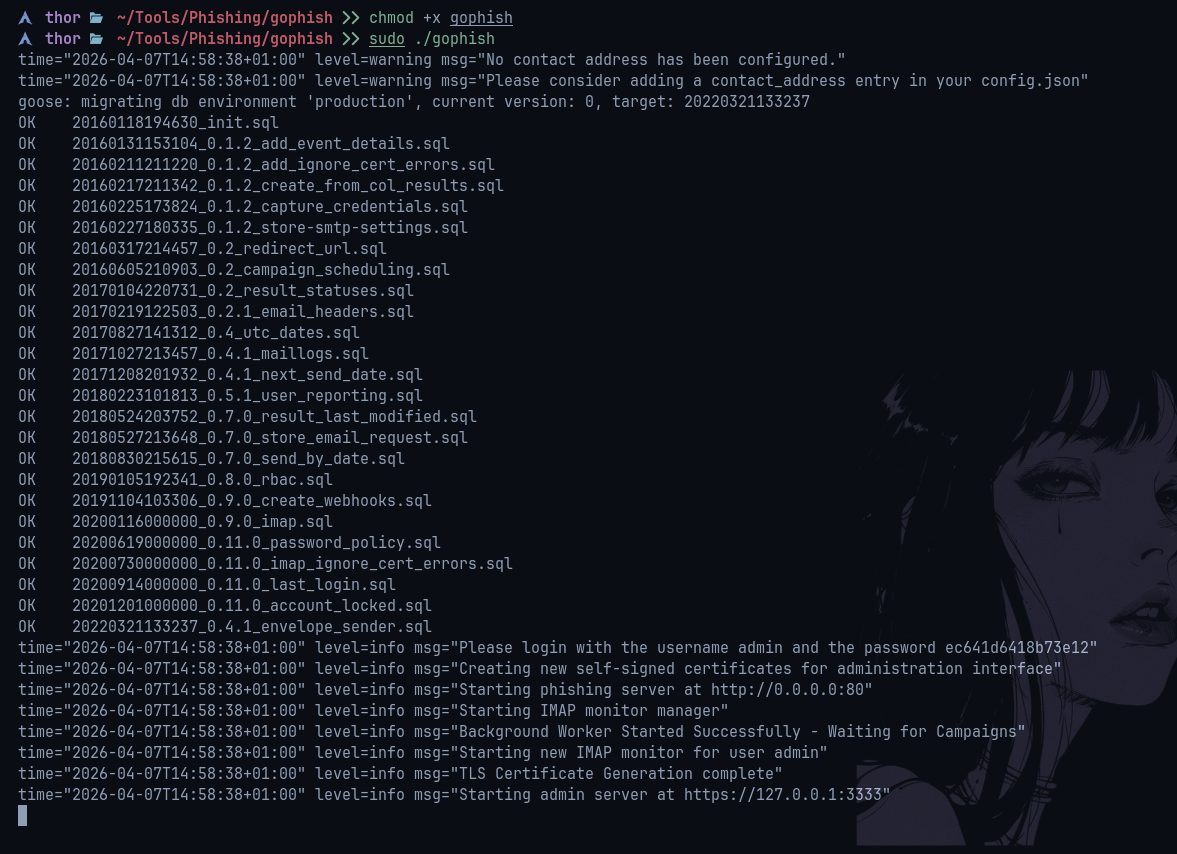
Running GoPhish
Going to the admin server on port 3333 will show the login panel. It will ask you to reset your password when you enter the temporary one provided - make sure you remember this. In a real environment, you would want this to be a long and secure password as well as adding some extra security controls in place (discussed in part 2).
Reset password
You should be presented with the GoPhish dashboard if it worked.
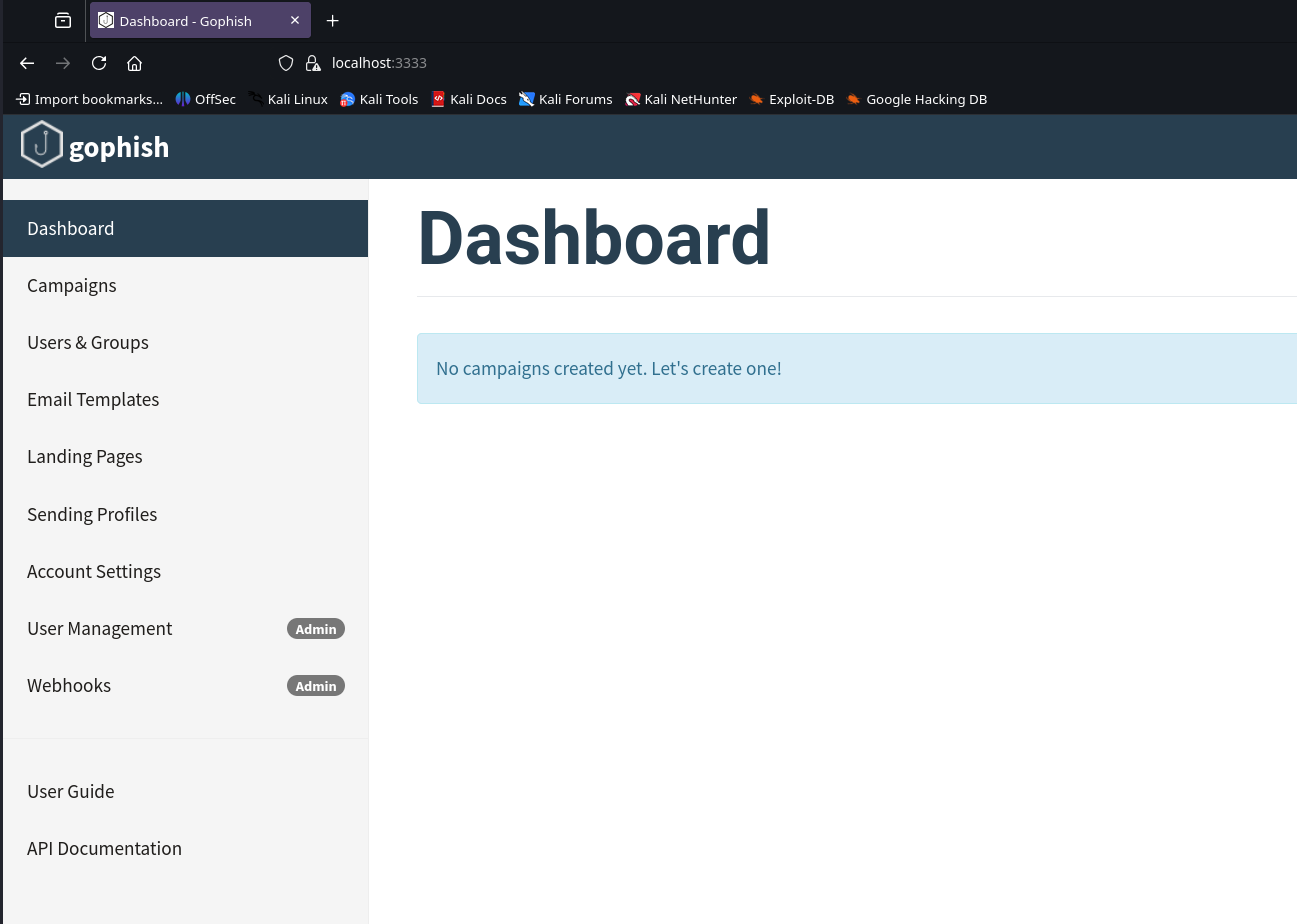
GoPhish dashboard
Before setting up any templates or campaigns, it's a good idea to send a test email to make sure everything is working. To do that, we need to configure a sending profile - basically telling GoPhish what email server to use, the account to authenticate with and what address it should come from. For example:
- Name: RootSec.local (can be anything)
- SMTP From: jamie.robinson@rootsec.local
- Host: 192.168.241.210/dc01.rootsec.local (the IP of the SMTP server/DC)
- Username/Password: creds of the account to send from
- Ignore Certificate Errors: ✅
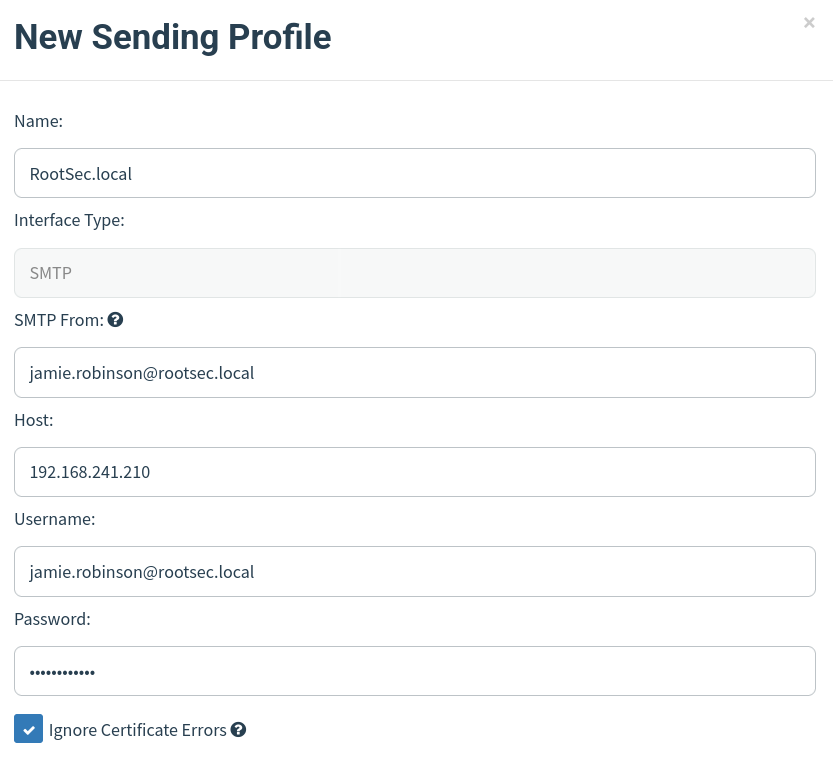
Sending profile
With the details filled in, try sending a test email to a user in your environment. For example, I will send an email to emily.carter@rootsec.local since the sending profile was setup for jamie.robinson.
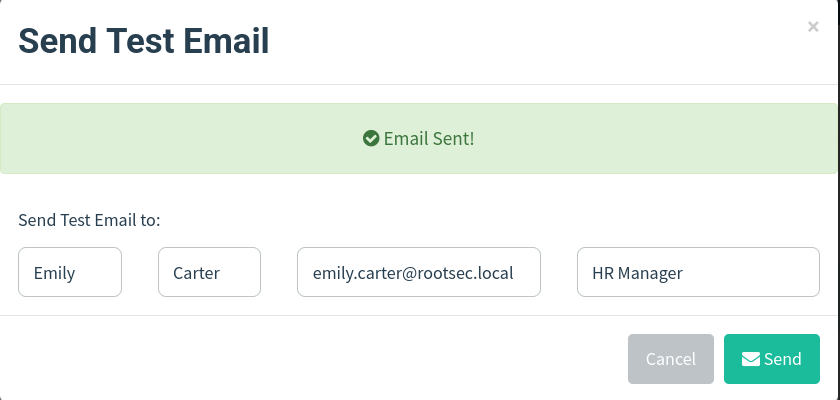
Send test email
If it says "Email Sent!", congratulations! A test email from GoPhish should arrive in your inbox and we can start playing around with templates and campaigns.
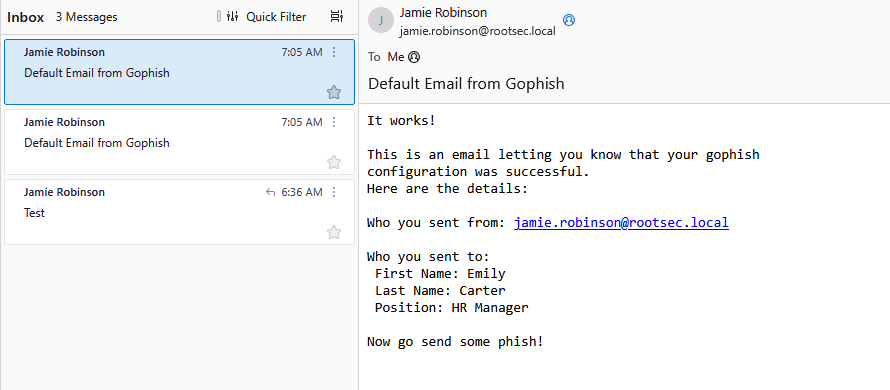
Email sent
Phishing Page Setup
To add more realism to our test environment, we can make sure our links/phishing pages have a hostname and not just the IP of our Kali machine. For this, we need to add a DNS record on our DC that points a legitimate looking URL to our Kali IP - feel free to be creative, but some ideas may be:- portal.rootsec.local
- vpn.rootsec.local
- admin.rootsec.local
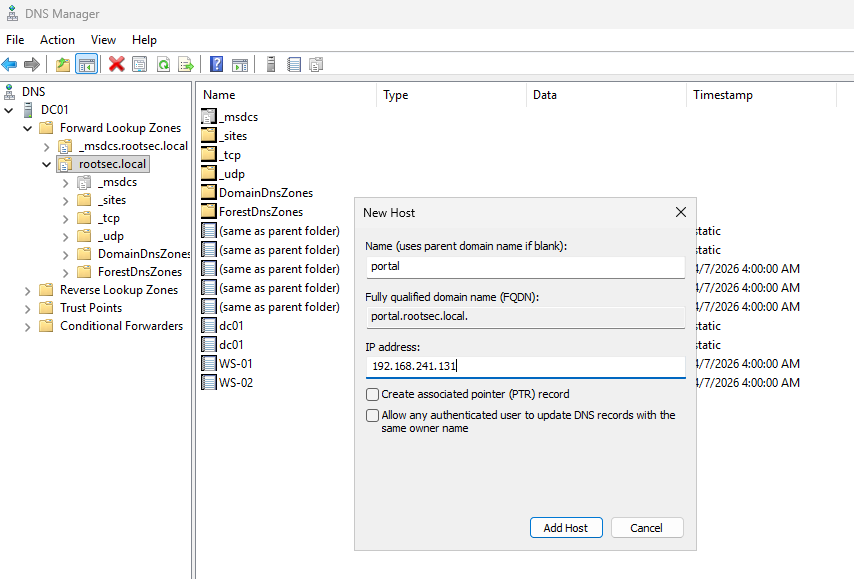
DNS record setup
Once set, make sure it's set appropriately and that the workstations can lookup the DNS record via nslookup:
1nslookup portal.rootsec.local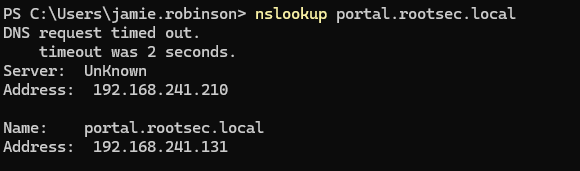
DNS lookup
If you try and access the site right now, nothing will appear as we don't have anything being hosted yet - if it returns a 404 page not found error that is expected and is a good sign so far.
Landing Page
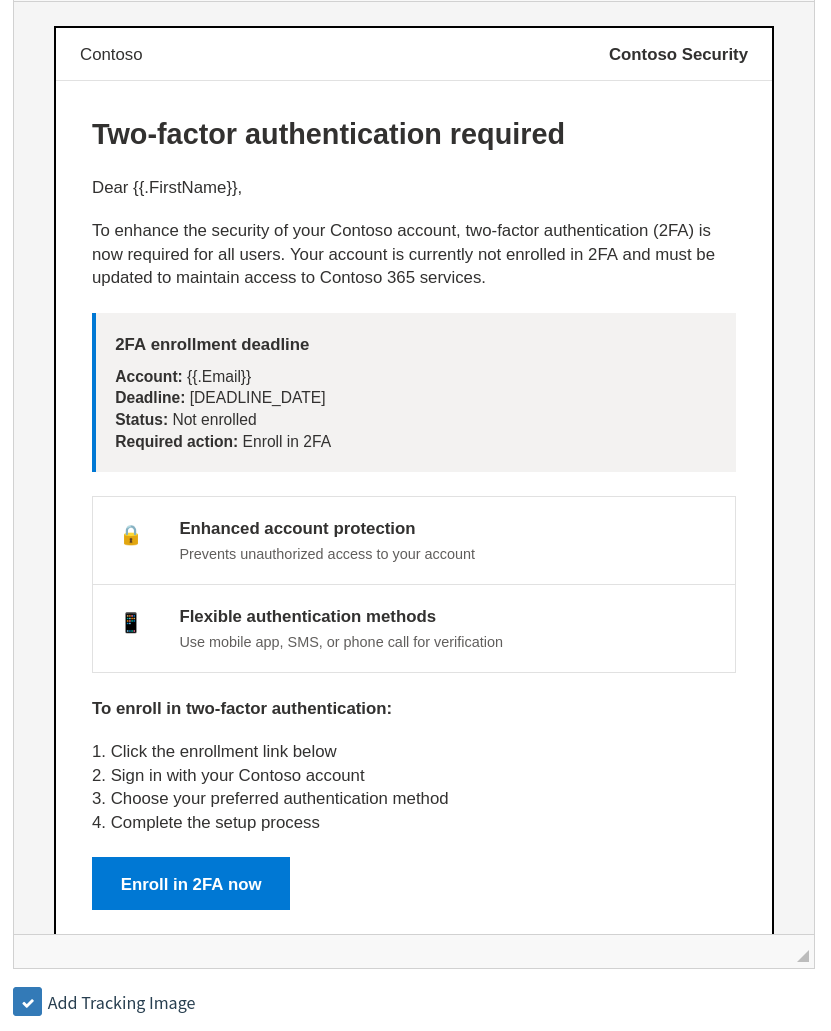
For us to actually host a site, we need to set up a landing page on GoPhish - this is the page the users will see when they click on your convincing phishing link. There are plenty of templates out there or you can make your own - experimentation is key for real engagements. Think about adding company branding, signatures, or even cloning a real page.Once you found a template or made your own via HTML, paste it into the box when creating a new landing page and you will be able to preview how it looks. I used an example MS login page found here.
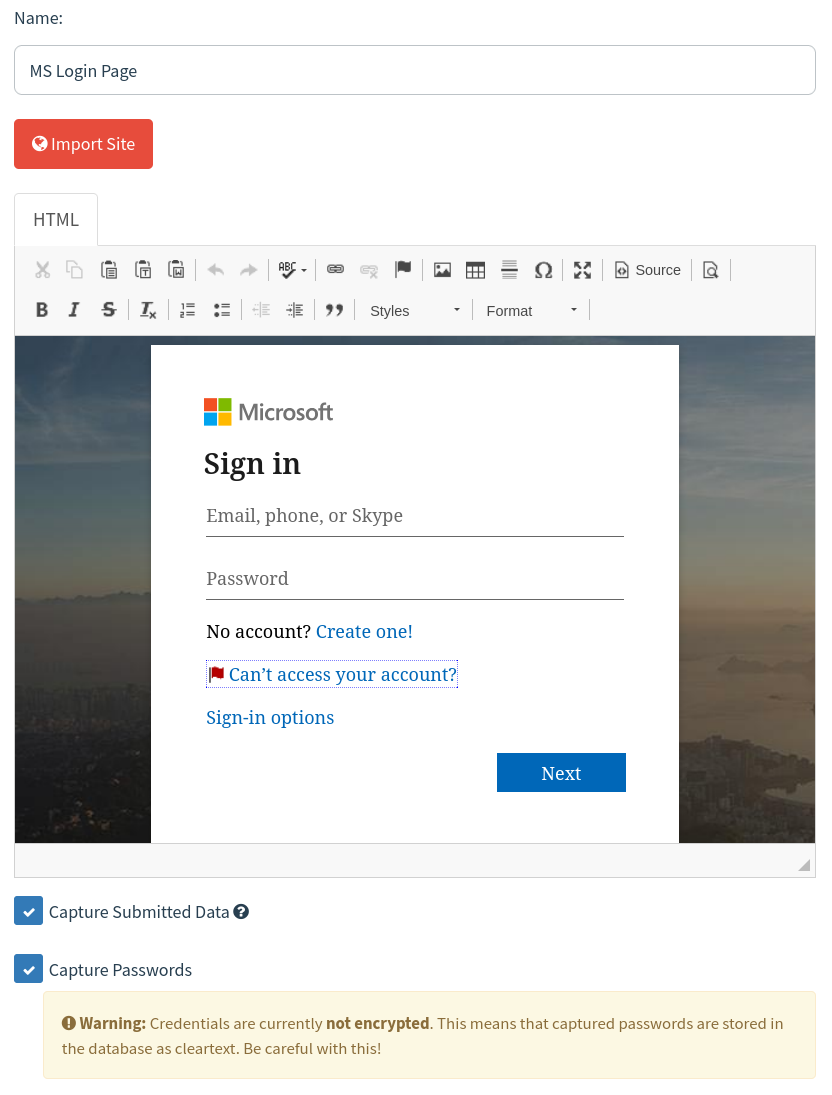
Landing page
Depending on if you want to capture passwords and store them in cleartext, you can check the "Capture Passwords" option - bear in mind, some clients may not want you to store their passwords unencrypted so this will vary by engagement.
There is also the option to redirect the user after they submit credentials to a different page - whether that be a page stating this was a phishing awareness test or a real login page (i.e. login.microsoftonline.com).

Redirect option
Email Template
Save the landing page and we can move on to the email template; this is, as the name suggests, the email that the client will receive in their inbox. Again, there are many templates out there for GoPhish emails so have a look around or build a custom one tailored to your client.Either way, make sure that the link that the user is going to click uses the GoPhish syntax of
{{.URL}} - this will be replaced dynamically by GoPhish when we make the campaign.
GoPhish URL variable
I grabbed a template from PhishingClub - another tool we will discuss later in the series which is a template asking that MFA be enabled and required. Simply copy the HTML and paste it into the box when creating a new email template.
Email template
Make sure to name the template, add the envelope sender and the email subject line as well. A good tip you can do is use the envelope sender syntax as the name and then the email in angle brackets as it may fool less security-oriented employees into thinking it came from the email in the brackets.
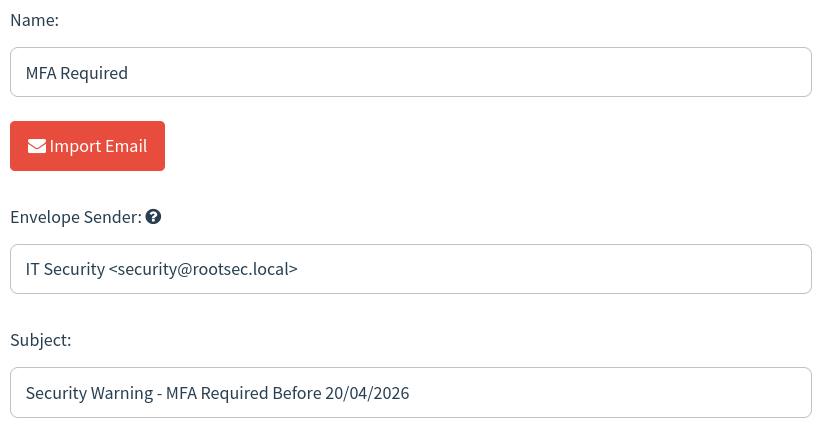
MFA template settings
Save the email template. Now for the fun part - time to send some phish.
Sending Some Phish
With our landing page and email templates set up, we need to quickly set up a list of users to send our email to under the "Users & Groups" tab. Simply create a new group, name it, and import your users from a CSV (if you had loads from your OSINT in a real engagement) or enter them manually.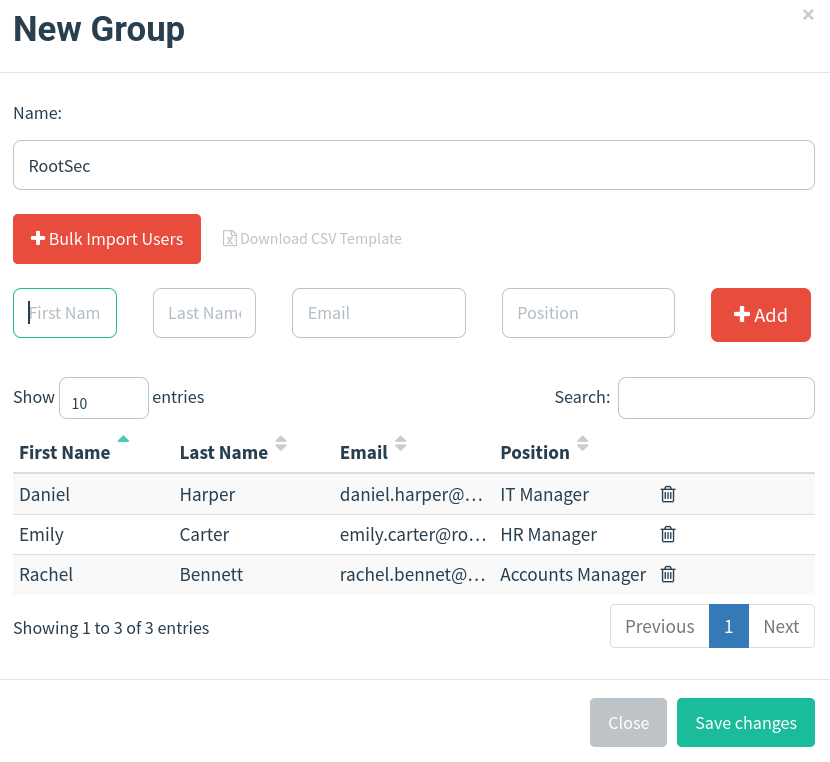
Users group
The last step is launching our campaign. Simply create a new campaign and fill in the details as follows, replacing what you need:
- Name: RootSec MFA (name it anything)
- Email Template: MFA Required (select your template)
- Landing Page: MS Login Page (select your landing page)
- URL: http://portal.rootsec.local (enter your domain you set up in DNS)
- Sending Profile: RootSec.local (select your profile)
- Groups: RootSec (select your group)
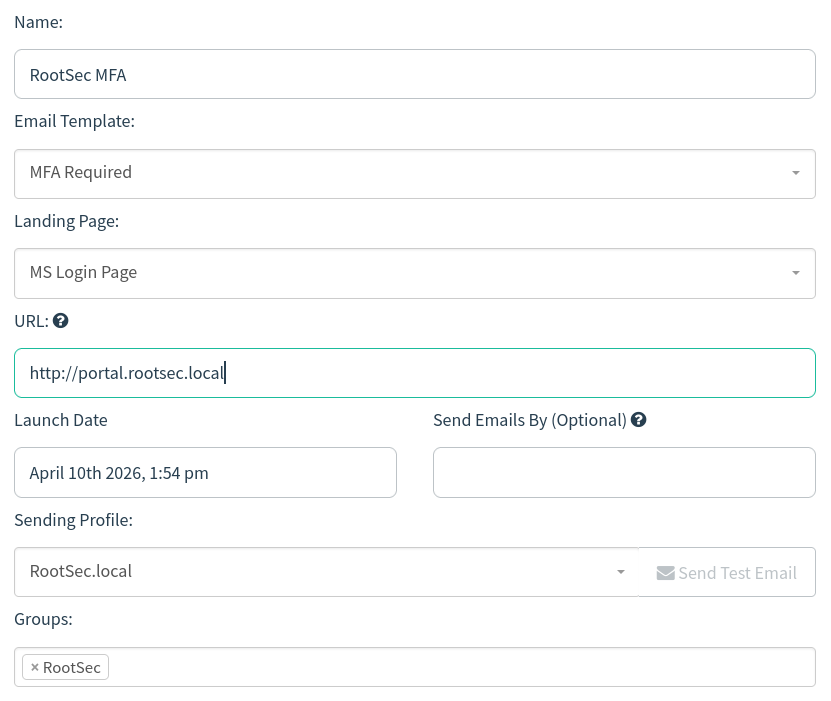
Campaign launch
Once you are sure everything is correct, launch the campaign. It should take you over to the campaign dashboard where you can see the details and status of the campaign.
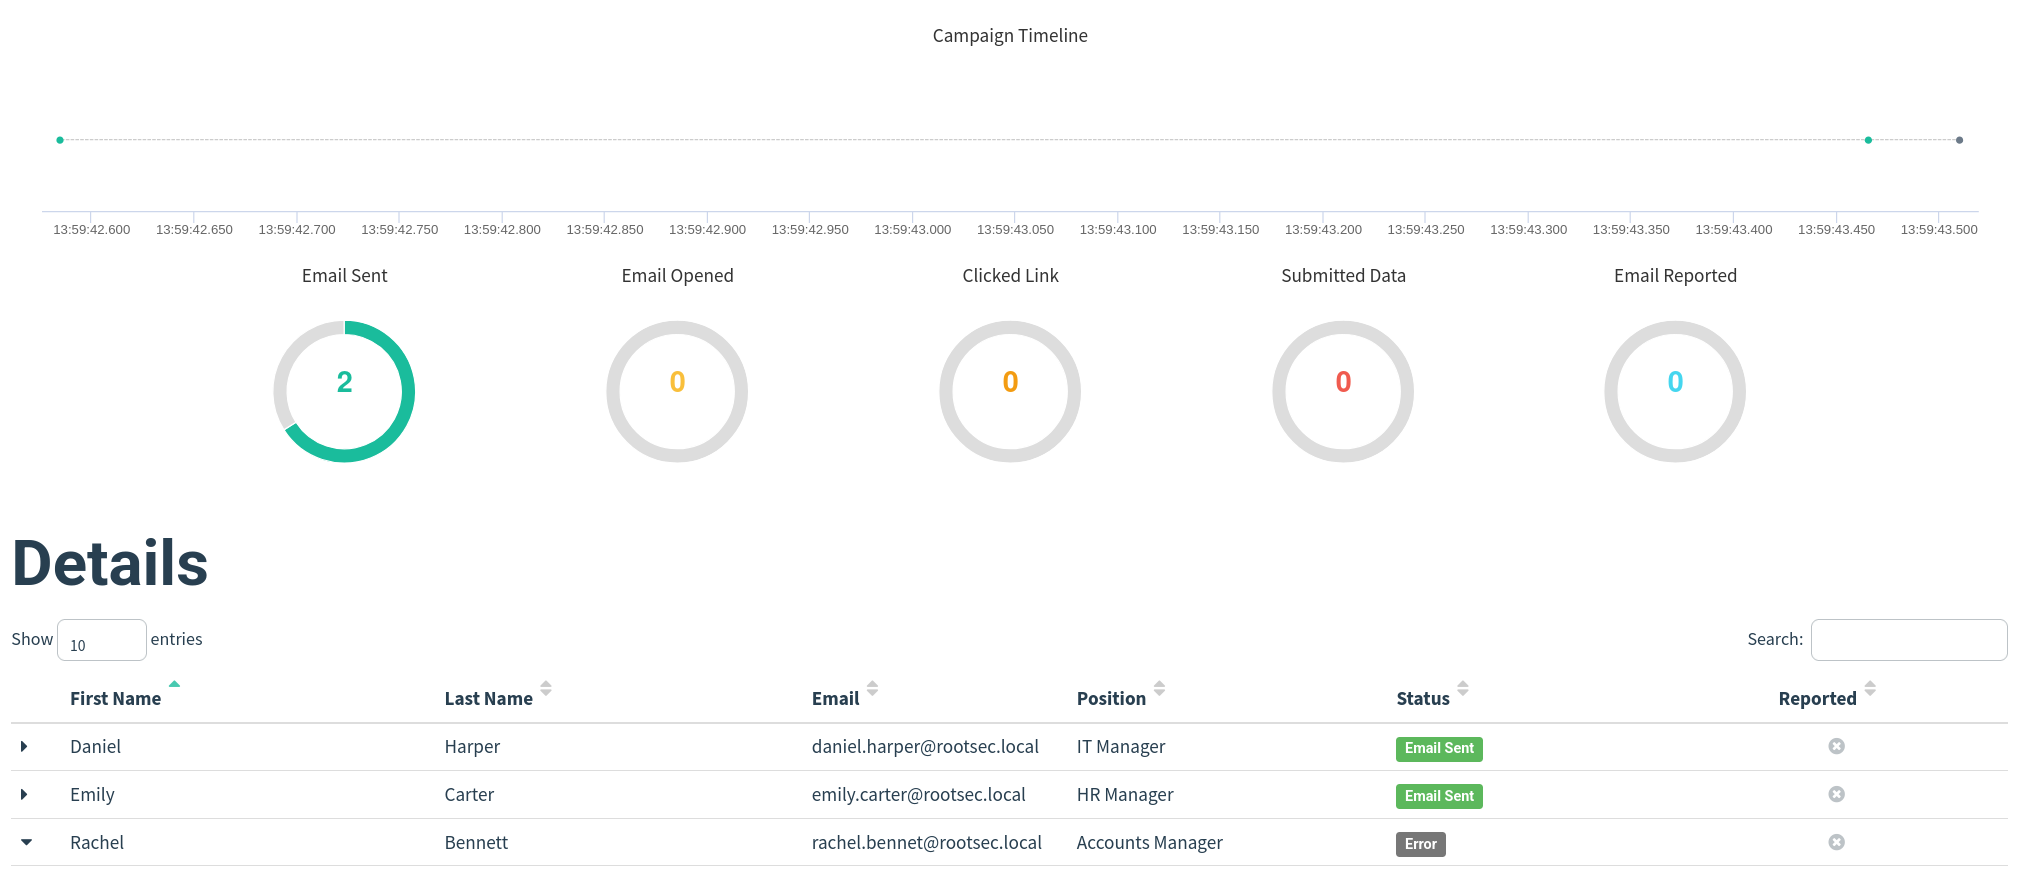
Campaign dashboard
Checking your email client, you should see the email in your inbox. You may also notice it automatically filled in the user's name at the start (Dear Daniel) - this is because in our email template, we also used the GoPhish variable
{{.FirstName}} which automatically gets replaced with the details we enter when creating our group of users.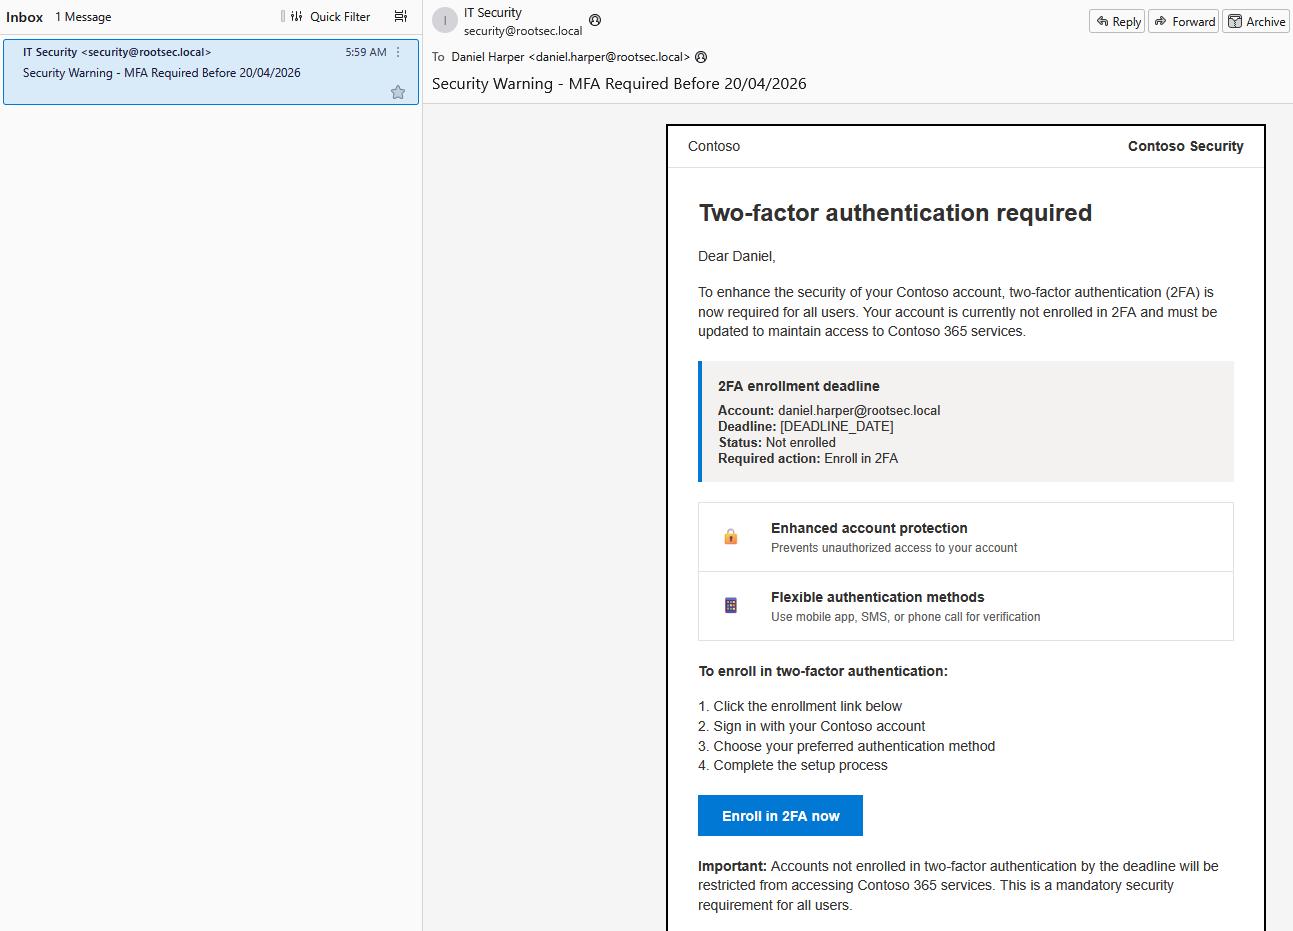
Email received
Clicking the link should take you to the phishing landing page hosted on portal.rootsec.local with a random RID value attached as a parameter - this is a unique, mandatory identifier (Recipient ID) appended to URLs (
?rid=...) that allows it to track user clicks and landing page interaction.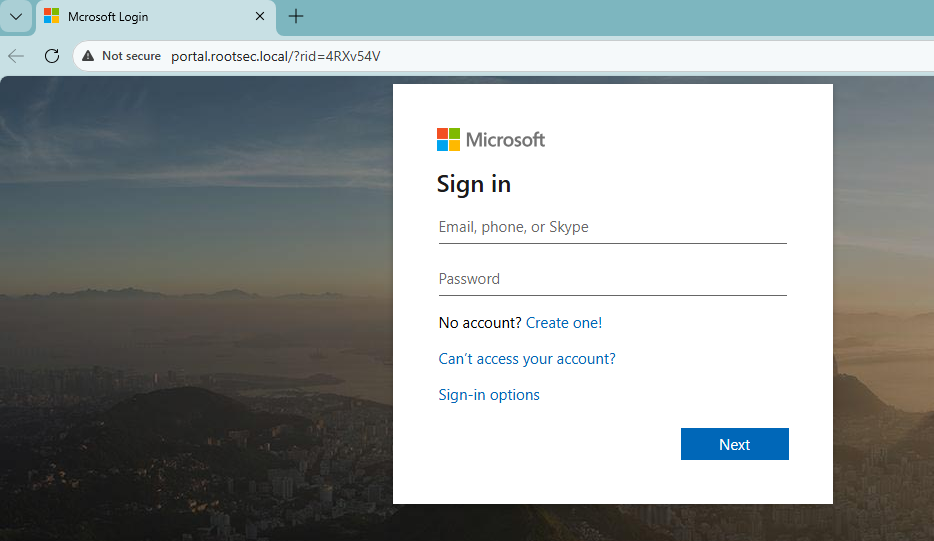
Landing page visit
If the user decides to enter their credentials, GoPhish will grab these for us and store them in the campaign dashboard. If you set a redirect URL, when the user hits submit the page will redirect them.
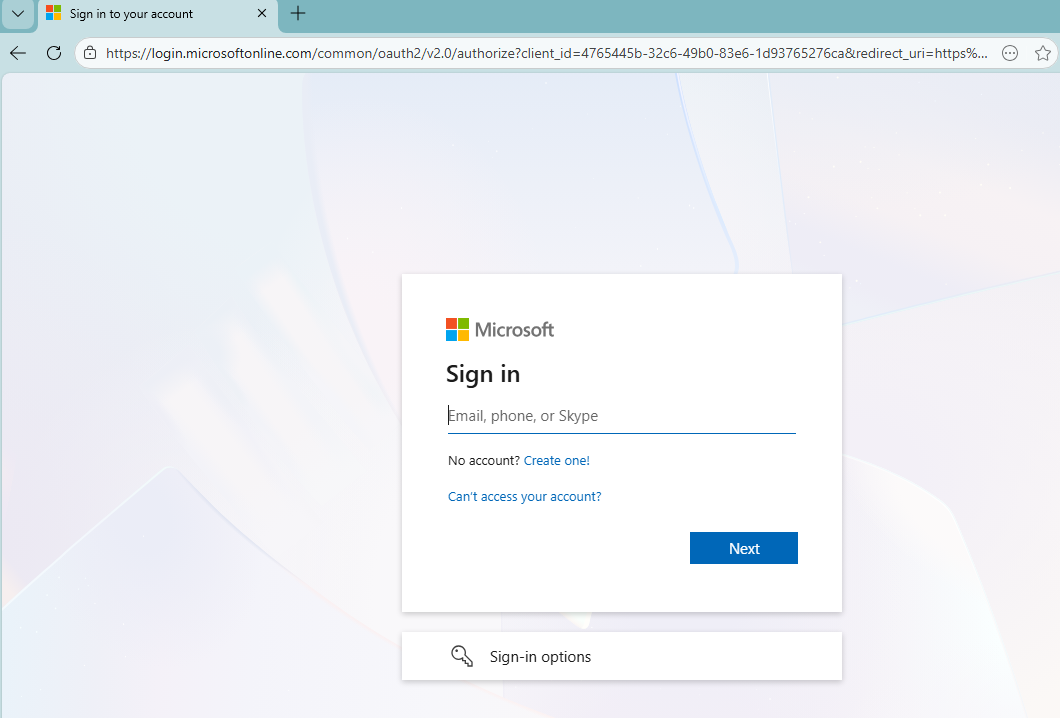
Real page redirect
Looking at the dashboard, the full timeline of the attack is present - tracking when the email was sent, opened, clicked and credentials submitted. You can open any individual user further and see what they did.
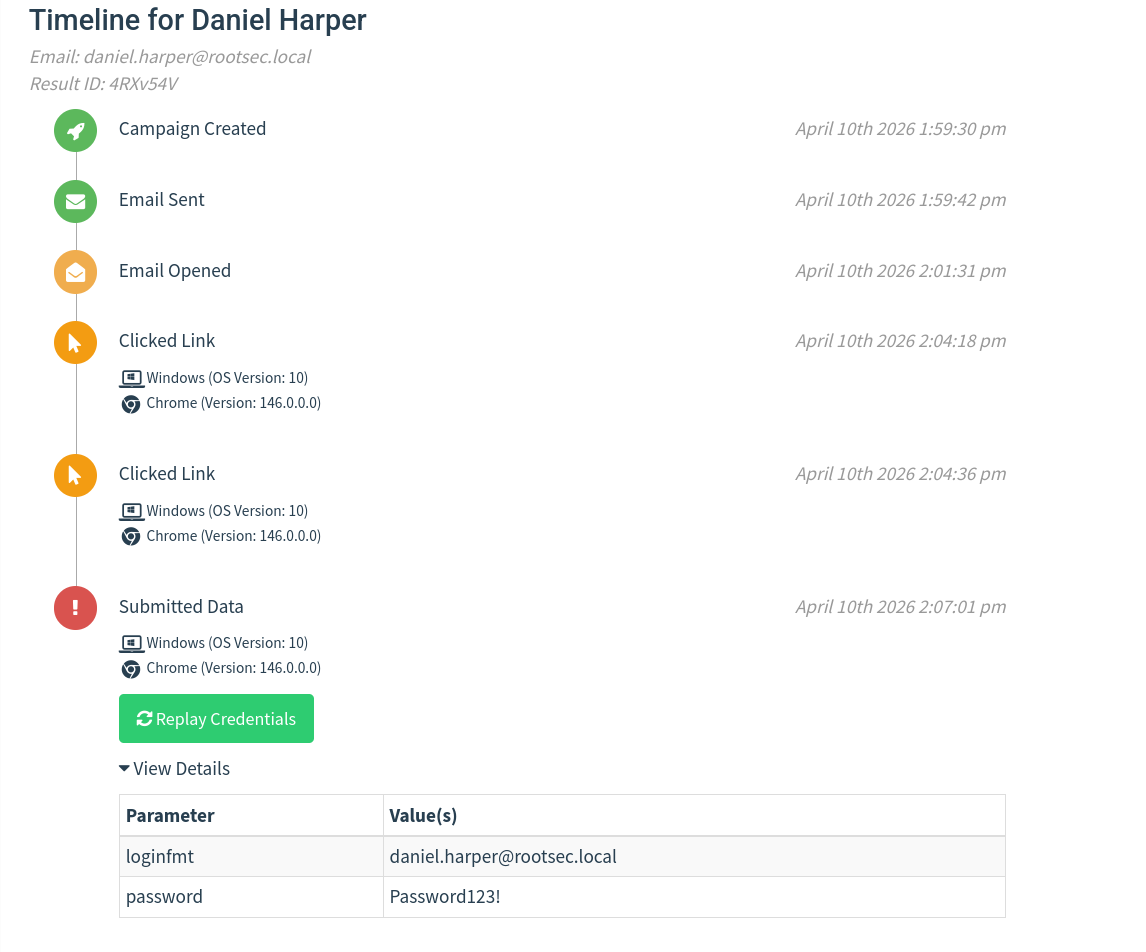
User activity timeline
GoPhish War Story
You may be wondering how effective GoPhish is in the real environment. Well, what if I said you can capture 500+ credentials over the course of 3 days? Would you believe me?One of our clients wanted to run a phishing awareness campaign against their organisation of roughly 2000 employees and they wanted it to be realistic - their branding, no typos or tell-tale signs of a phishing email to get a real perspective of how prepared they are.
We set up GoPhish with a custom domain relating to employee benefits. Our email template that we used talked about recycling old IT equipment with the incentive that you can fill out a form and maybe get an old laptop, old work phone, monitors and so on - free stuff is always enticing.
We also added their branding at the bottom to make it appear more legitimate which we got from simply emailing a public HR email and grabbing the signature for ourselves. The emails were then sent out in batches of 100 at a time over 3 days, roughly every 1-2 hours.
Over the course of those 3 days, we got bombarded with credentials from every department - IT, HR, Finance, Legal, and so on. Everybody wanted some free tech! We even had people responding to the phishing email saying that our form was broken, but asking if they could reserve a laptop - over 100 people replied asking to reserve an item.
In short, GoPhish can be very effective if you have a good domain, a good enticing email and use their own branding against them.
Conclusion
At this point, you have a fully functional GoPhish phishing lab you can practice with. You’ve got a small domain with users and mailboxes, an email client to see how messages actually look, and GoPhish sending emails without having to go through the pain of setting it up in Gmail or another email provider.You can send an email, click the link, submit credentials, and then watch that activity appear in the dashboard, which is really the main goal of this setup. And now you have the skills to catch some big fish!

The next step is to take this outside the lab and set it up in a way that behaves more like a real environment. I am fully aware that this does require some costs and not everyone will be able to follow along. However, if you just want to learn GoPhish, then we just accomplished that. Along this series, I will try to keep costs to a bare minimum so it's accessible for most people to play around and learn these skills.
As for the next steps, that means using a VPS, registering a domain, and dealing with DNS and email delivery. Getting emails into inboxes will take more effort, and you’ll start running into things being blocked or filtered - but that's what makes it fun right?